Views: 0 Author: Site Editor Publish Time: 2026-08-01 Origin: Site

Investing in a premium heating unit cannot overcome the thermal physics of poor spatial placement. You can buy the highest-rated equipment on the market, but installing it in the wrong location guarantees your sauna will underperform. Proper placement dictates how air flows, how heat distributes, and how comfortable you feel inside the cabin.
Many DIY and poorly planned commercial sauna builds suffer from severe temperature stratification. You experience the cold feet phenomenon, where your head is sweltering but your toes are freezing. Other common failures include thermal dead spots, premature heater cycling, stagnant air quality, and rapid oxygen depletion. These issues ruin the experience and cause lightheadedness.
Authentic Finnish sauna air quality relies on a strict physical balance. It requires high heat paired with continuous fresh oxygen exchange. This dynamic airflow prevents fatigue and ensures a rejuvenating sweat session. Evaluating your heater positioning is the first step to building a functional sauna. You must pair this placement with precise intake and exhaust ventilation to guarantee efficient convection, optimal drying, and strict safety compliance.
Convection is King: A sauna heater relies on a continuous convection loop; placement must facilitate the natural rise of hot air and the controlled introduction of fresh, cool air.
Moving Air Feels Hotter: Good ventilation and heater placement push dynamic, warm air currents over the skin, increasing perceived heat and sweat production compared to stagnant, trapped air.
Ventilation Dictates Performance: Heater placement is only 50% of the equation; intake and exhaust vent locations must be mapped directly to the heater's position to prevent heat loss and ensure breathable air.
Post-Use Drying Prolongs Lifespan: Proper placement paired with exhaust paths ensures residual heater heat dries the sauna cabin after use, preventing mold and wood rot.
Clearances Limit Options: Strict manufacturer safety clearances dictate viable placement zones, heavily influencing the choice between wall-mounted, floor-standing, or external configurations.
A successful sauna environment requires even heat distribution across both the upper and lower benches. You need consistent fresh air exchange, stable humidity when water hits the stones, and high oxygen availability. Achieving this baseline requires a deep understanding of thermal dynamics and how air moves through a confined wooden space.
Your heating unit relies entirely on convection to warm the room. It draws cool air from the floor, heats it through the rock cavity, and pushes it up to the ceiling. This process creates a rolling thermal current. The hot air travels across the ceiling, cools slightly as it descends along the opposite wall, and cycles back toward the heat source. Interrupting this loop destroys efficiency. If you place benches or solid wooden skirts directly in the path of this return air, the heater starves for cold air. It will overheat internally while the rest of the room remains tepid.
To maintain a strong convection loop, the space beneath the heater must remain completely unobstructed. We typically recommend leaving at least a six-inch gap between the bottom of the heater and the floor for wall-mounted units. This gap allows a massive volume of cold air to sweep under the unit, get superheated by the elements, and rocket upward. When you restrict this bottom intake, the air velocity drops. The heat simply pools around the unit itself rather than projecting across the room.
Moving, ventilated air transfers heat to your skin much faster than static air. This debunks the myth that sealing all air gaps makes a room hotter. A well-ventilated space pushes dynamic heat waves over your body. This active airflow increases your sweat production and makes the ambient temperature feel significantly more intense. Think of it like a convection oven versus a standard radiant oven. The moving air strips away the microscopic layer of cooler air that naturally forms over human skin.
When builders try to trap heat by sealing every crack, they create a suffocating environment. The air becomes heavy and stale. The thermometer might read 190 degrees Fahrenheit, but your body will not sweat efficiently. You will feel oppressed rather than relaxed. Introducing a controlled draft through proper heater placement and venting changes the entire dynamic. The air feels lighter, sharper, and much hotter on the skin, even if the actual ambient temperature drops by a few degrees.
Heat naturally pools at the ceiling. Without proper airflow management, the lower half of your room remains uncomfortably cold. Strategic placement forces the heat envelope lower down into the bench zone. By manipulating where the air enters and exits, you can pull that trapped ceiling heat down to where you are actually sitting. This is why bench height is directly tied to heater placement.
If you mount a heater too high on the wall, the heat envelope starts higher. The bottom third of the room will never get warm. We always mount heaters as low as the manufacturer clearances allow. This maximizes the volume of heated air in the room. Furthermore, installing a mechanical downdraft system can actively pull the hot ceiling air down through the bench structure, completely eliminating the cold feet phenomenon. This requires careful planning during the framing stage to route ductwork inside the walls.
Crumbling stones severely restrict internal airflow within the unit itself. This choking effect destroys the natural chimney draft. It compounds the negative effects of poor room placement. You must maintain your stones regularly to ensure air can flow freely through the heating elements and up into the room. Over time, the extreme temperature fluctuations cause even the hardest vulcanite or olivine diabase stones to crack and splinter.
These small stone fragments fall deep into the heater cavity. They pack tightly around the heating elements, blocking the vertical air channels. When the air cannot flow up, the elements overheat and burn out prematurely. We recommend pulling all the stones out of your heater at least once a year. Wash them, discard any that show signs of crumbling, and repack the cavity loosely. This simple maintenance task ensures your heater placement strategy actually works as intended.
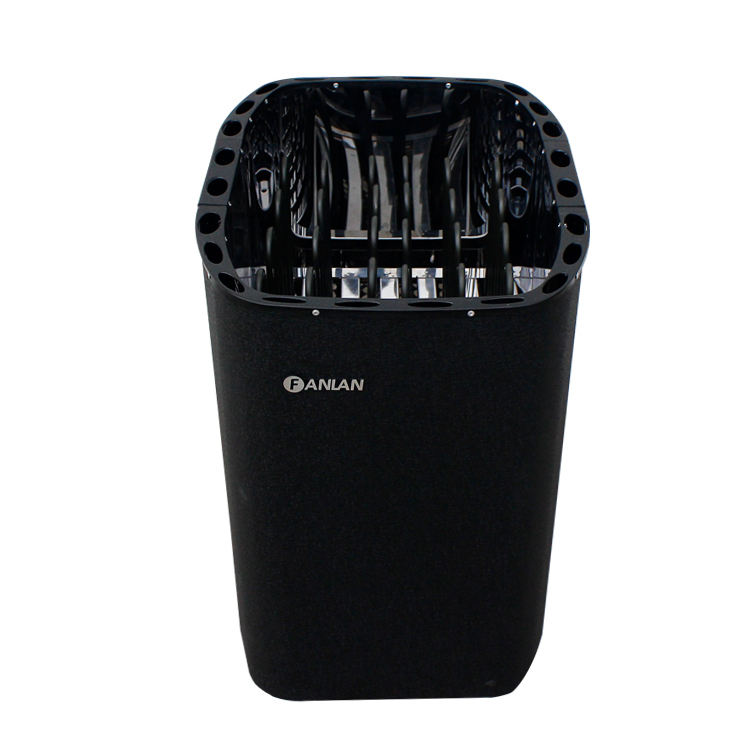
Choosing the right configuration depends entirely on your available space and desired airflow patterns. Each style offers distinct advantages and specific installation requirements. You must evaluate your room dimensions, framing layout, and electrical routing before committing to a specific heater type.
Wall-mounted units are excellent for compact spaces. They optimize valuable floor space, allowing for more legroom and easier cleaning. However, they limit lower-level heat draw because they sit higher off the ground. When installing a wall-mounted unit, you must ensure the wall framing can support the weight. A fully loaded heater can weigh over 100 pounds. You need solid wood blocking between the studs directly behind the mounting bracket.
Floor-standing pillar models allow 360-degree airflow. They pull cold air directly from the floor level, providing superior lower-bench heating and a more even temperature gradient. These units hold a massive amount of stone, often exceeding 200 pounds. This creates a softer, more lingering heat. Because they sit on the floor, you must ensure the flooring material is non-combustible and can handle the concentrated weight. Tile or poured concrete works best under these massive units.
Utilizing an External Sauna Heater Stove changes the entire layout dynamic. These units are fed from an adjacent room or exterior wall. The primary benefit is zero interior space consumption. For wood-burning setups, it completely eliminates indoor oxygen depletion and keeps ash out of the clean room. You feed the fire from outside, keeping the sauna interior pristine.
The drawbacks include potential heat loss through the wall penetration, more complex installation requirements, and slightly delayed interior heat-up times. You must frame a specific fireproof opening through the wall to accommodate the extended firebox. This usually involves masonry work or specialized double-wall insulated metal shields. Despite the extra labor, an external feed is highly desirable for commercial setups or high-end residential builds where interior cleanliness is a top priority.
Placing the unit near the door is the industry standard. This utilizes the natural draft from the door gap to feed the convection loop. It also minimizes cold air intrusion into the seating area when someone enters. As the door opens, the incoming cold air is immediately sucked into the heater's updraft, warmed, and circulated. If you place the heater far from the door, that cold air sweeps across the floor and chills the occupants' feet.
Corner placement saves space but risks restricted airflow and localized overheating. If you tuck a heater too tightly into a corner, the air cannot flow around the sides. The adjacent wood panels absorb massive amounts of radiant heat, increasing the risk of dry-fire hazards. Center placement works beautifully for large, circular, or custom builds utilizing pillar models. It maximizes 360-degree radiant heat, but requires running electrical conduit through the floor slab before pouring concrete.
Placement means nothing without proper ventilation. The two systems must work together to create a breathable, hot environment. You cannot just cut holes in the wall randomly. The intake and exhaust must be engineered to support the heater's specific convection loop.
You must place the intake vent directly under or immediately behind your Sauna Heater. The updraft acts as a natural suction engine. It pulls fresh air in and instantly heats it before it reaches the occupants. If the intake is too far away, cold air will pool on the floor and disrupt the entire thermal dynamic.
For wall-mounted electric units, we cut the intake vent directly through the wall, positioning the center of the vent about four inches above the floor. This aligns perfectly with the bottom of the heater. The incoming air hits the hot elements immediately. We use a standard 4-inch or 6-inch louvered vent cover. Never install a closable vent on the intake behind the heater. It must remain open at all times to ensure the elements receive adequate cooling airflow.
Follow the Law of Diagonals. Place the exhaust vent on the wall opposite the heat source. Typically, this goes under the benches or at a mid-wall height. This forces hot air to travel entirely across the seating zone before exiting. It maximizes heat exposure and ensures stale air is continuously removed from the breathing zone.
If you place the exhaust vent on the ceiling directly above the heater, the hot air will short-circuit. It will rise from the heater and immediately exit the room. The benches will remain freezing cold. By forcing the air to travel diagonally across the room and down toward the floor, you utilize every ounce of thermal energy before expelling the stale air.
Passive ventilation often suffices for traditional outdoor builds with natural drafts. Indoor electric rooms usually require mechanical downdraft fans to overcome stagnant air. The floor-fan assist method involves using passive or mechanical fans blowing upward directly into the base. This supercharges natural convection in challenging or awkwardly shaped layouts.
When designing a mechanical system, use an inline duct fan rated for high temperatures and high humidity. Mount the fan outside the sauna envelope to reduce noise. The fan should pull air from the lower exhaust vent and push it outside the building. This creates a slight negative pressure inside the sauna, which actively pulls fresh air through the intake vent behind the heater. This mechanical assist guarantees perfect air quality regardless of weather conditions outside.
Strategic exhaust placement allows residual heat to dry out the cabin post-session. Once you turn the unit off, the remaining heat continues to circulate. This active drying process mitigates wood decay, prevents mold growth, and eliminates lingering odors. Wood is highly porous and absorbs massive amounts of sweat and steam during a session.
To ensure proper drying, leave the exhaust vent fully open and prop the door open slightly after you finish. The residual heat from the stones will drive the moisture out of the wood. The ventilation system will carry that humid air out of the room. If you trap that moisture inside, the cedar or hemlock will turn black with mold within a few months. Proper placement and venting protect your structural investment.
Avoid these frequent errors to ensure your build functions safely and efficiently. We see the same mistakes repeatedly in DIY builds, and they always result in poor performance or dangerous conditions.
Placing a unit in a tight alcove or too close to a low ceiling traps heat. This trapped heat bounces back onto the internal sensor. The thermostat reads this false high temperature and shuts the system off before the rest of the room reaches your target heat. The heater thinks the room is 190 degrees, but the benches are only 120 degrees.
To fix this, you must adhere to the manufacturer's ceiling height requirements. Most require a minimum of 44 to 47 inches between the top of the heater and the ceiling. If your ceiling is too low, you must lower the heater or install a heat deflector shield to push the hot air outward rather than letting it pool directly above the sensor.
Placing the unit too far from the intake creates pockets of cold, stale air. Blocking the airflow path with structural elements or oversized benches disrupts the convection loop. You must maintain clear pathways for air to rise and fall naturally. Do not build solid wood skirts all the way to the floor around your benches. Leave gaps for air to flow underneath.
Never place the unit directly opposite the door. Opening the door immediately exhausts your built-up heat bank. It disrupts the convection loop and pulls cold air directly across the seating area, chilling the occupants. Always position the heater on the same wall as the door, or on an adjacent wall close to the door frame.
Packing stones too tightly blocks crucial air pathways. The system is forced to overheat internally while leaving the cabin cold. Always stack stones loosely to allow maximum air passage over the heating elements. Place the largest stones at the bottom and the smallest at the top. Never force a stone between the heating elements; this will cause the metal to warp and snap.
Violating manufacturer clearances is a critical risk. It leads to degraded wall materials, serious fire hazards, and voided warranties. Always measure twice and adhere strictly to the manual. Combustible materials will undergo pyrolysis over time if exposed to constant high heat. The wood dries out completely and its ignition temperature drops significantly. What was safe on day one might catch fire on day 300.
| Placement Mistake | Thermal Consequence | Safety and Hardware Risk |
|---|---|---|
| Too close to ceiling | Severe short-cycling and false sensor readings | Overheated sensors, wood scorching, pyrolysis |
| Opposite the door | Rapid heat loss upon entry and exit | Increased energy consumption, overworked elements |
| Blocked intake vent | Stagnant air, oxygen depletion, cold floors | Element burnout from poor cooling airflow |
| Tight corner alcove | Restricted convection loop, trapped heat | Fire hazard on adjacent wood panels |
| Solid bench skirts | Blocked return air path | Uneven heating, cold lower benches |
Selecting the correct equipment requires matching the output and architecture to your specific room dimensions and materials. You cannot just guess the size based on square footage alone.
Calculate your required kilowatt output based on more than just cubic footage. You must compensate for uninsulated exterior walls, glass doors, or large windows. A unit placed near a large glass panel will lose heat rapidly and requires a higher kW rating to maintain ambient temperatures. The standard rule is 1 kW for every 45 cubic feet of well-insulated space.
However, for every square foot of glass or uninsulated masonry, you must add 1.2 cubic feet to your total volume calculation. If you have a full glass front on your sauna, you might need to jump from an 8kW heater to a 10.5kW heater just to overcome the thermal loss through the glass. Undersizing the heater is a permanent mistake that results in endless frustration.
High-stone-capacity models are better for soft, lingering heat. They are more forgiving of slight placement errors because the massive stone volume radiates heat evenly. Low-stone, high-element models offer faster heat-up times. However, they are highly dependent on perfect convection loops to distribute that rapid heat without short-cycling. Choose the architecture that matches your patience level and your framing constraints.
A heating unit cannot function in isolation. Its placement, paired with precise ventilation, dictates your entire thermal experience. Proper positioning ensures even heat, fresh air, and a safe environment. You must plan the layout before you cut a single piece of wood.
Choose wall-mounted models for tight indoor spaces. Opt for pillar models in central or open layouts. Select an external configuration when interior space is at a premium or when you prefer wood-burning without the indoor mess.
Measure your available floor footprint and ceiling height accurately to determine maximum clearance zones.
Map out your intake and exhaust vent locations before running any electrical wire or installing insulation.
Review the specific manufacturer clearance manual for your chosen model to verify framing requirements.
Calculate your required kW output, factoring in glass doors, uninsulated walls, and cold floors.
Install solid wood blocking between the wall studs to support the weight of wall-mounted units.
A: The standard and most effective placement is adjacent to the door. This location utilizes the natural draft from the door gap to feed the convection loop. It also prevents cold air from sweeping across the seating area when someone enters the room.
A: Convective heat transfer makes moving air feel hotter. Dynamic, ventilated air pushes heat waves directly over your skin. This active airflow transfers thermal energy much more rapidly than stagnant air, increasing your sweat production and perceived heat.
A: Yes, if you use a 360-degree pillar model. Center placement requires under-floor wiring and a dedicated floor-level intake vent directly beneath the unit. This setup is ideal for large or custom circular layouts to maximize radiant heat.
A: Clearances vary wildly by manufacturer and kW output. Standard electric models typically require 2 to 6 inches of clearance from combustible walls. You must strictly adhere to the specific guidelines in your owner manual to prevent fire hazards.
A: Cold floors result from thermal stratification, where hot air pools at the ceiling and fails to circulate downward. You can resolve this by installing mechanical downdraft ventilation, lowering your seating, or switching to a floor-standing unit that draws air from the ground.
A: Yes. A door gap provides passive draft, but a dedicated intake vent directly under the unit is crucial. The dedicated vent ensures a concentrated stream of fresh air is immediately pulled into the heating elements, maximizing the convection loop efficiency.
A: An external unit saves valuable interior space and keeps the sauna room clean. For wood-burning models, feeding the fire from outside prevents indoor oxygen depletion, eliminates ash inside the clean room, and reduces the risk of accidental burns.


