
Views: 0 Author: Site Editor Publish Time: 2026-08-02 Origin: Site


A 3KW unit appeals to many homeowners planning a custom sauna build. These compact units offer a smaller physical footprint for tight spaces and seem easier to wire. For anyone converting a small closet or a master bathroom corner, a 3KW unit looks like the logical choice. However, selecting the right heating element requires far more than matching a box to a small room.
The core problem builders face is the high risk of under-sizing. An underpowered heating unit results in a room that takes hours to warm up, struggles to break the 150°F (65°C) threshold, and constantly runs at maximum load. This continuous strain inevitably leads to premature element failure. Determining if a 3KW unit is sufficient requires moving past basic room dimensions. Builders must calculate the adjusted volume by factoring in insulation quality, glass surfaces, ambient starting temperatures, and the realities of electrical power delivery.
Strict Volume Limits: A 3KW heater is strictly viable only for highly insulated, small-footprint spaces (typically under 130 cubic feet or 3.5 cubic meters), ideal for 1-to-2 person indoor saunas.
The Glass Penalty: Uninsulated surfaces like glass doors, windows, or stone walls artificially inflate the heating demand, often pushing a small sauna out of the 3KW capability range.
Electrical Realities: Despite its small size, a 3KW home electric sauna heater often still requires a dedicated 220V/240V circuit; assuming it will run on a standard 110V/120V household outlet is a common, costly mistake.
Heat-Up Times: Even in an appropriately sized room, a 3KW unit will require a longer pre-heating phase (45–60 minutes) compared to oversized units.
Regional & Placement Factors: Outdoor installations in cold northern climates (e.g., Canada, Northern US) drastically increase heat loss, making a 3KW unit highly impractical for anything other than climate-controlled indoor spaces.
Buyers often look at the physical dimensions of their planned room without fully understanding the thermal output required to reach traditional bathing temperatures. A proper traditional experience requires the room to hit between 175°F and 195°F (80°C to 90°C). Reaching these temperatures requires a specific ratio of thermal energy to air volume, assuming that the air is properly contained and insulated. When we frame out a hot room, we do not just measure the studs. We evaluate the entire thermal envelope.
The industry-standard baseline for sizing is straightforward. You need 1 kilowatt of power for every 1 cubic meter of well-insulated space. One cubic meter translates to approximately 35.3 cubic feet. This formula provides the foundational starting point for any build. Applying this direct calculation to a 3KW unit reveals its strict limitations. The baseline capacity for a 3KW element is roughly 3 cubic meters. Translated to imperial measurements, this means the absolute maximum volume it can effectively heat is between 105 and 130 cubic feet. Pushing the unit beyond this volume guarantees subpar performance.
To put this into perspective, consider the standard dimensions used in residential framing. If you frame a room with standard 2x4 construction, add your insulation, and finish the interior with tongue-and-groove cedar, the internal volume shrinks slightly from your rough opening. Even with this reduction, a 3KW unit maxes out very quickly.
| Physical Room Dimensions (L x W x H) | Calculated Cubic Feet | Recommended Minimum KW | Is 3KW Sufficient? |
|---|---|---|---|
| 4 ft x 4 ft x 7 ft | 112 cu. ft. | 3.0 KW | Yes (if perfectly insulated) |
| 4 ft x 5 ft x 7 ft | 140 cu. ft. | 4.5 KW | No |
| 5 ft x 5 ft x 7 ft | 175 cu. ft. | 4.5 KW - 6.0 KW | No |
| 6 ft x 6 ft x 7 ft | 252 cu. ft. | 8.0 KW | No |
Understanding what 105 to 130 cubic feet looks like in the real world helps set realistic expectations. This volume typically translates to physical dimensions of a 4x4x7 foot room. This is a compact, strictly one-to-two person enclosure where bathers sit very close to the heat source. You will not be laying down on the benches in a room this size. The layout usually consists of a single upper bench and a small lower step.
This baseline assumes perfect environmental conditions. The 130-cubic-foot maximum is only achievable if the room features R-13 to R-19 insulation in the walls and ceiling. You must also install a perfectly sealed foil vapor barrier to reflect radiant heat back into the room. Tape every seam with high-temperature aluminum tape. Furthermore, the indoor ambient starting temperature must be at least 68°F (20°C). Any deviation from these perfect conditions immediately reduces the maximum effective volume.
Heater design heavily influences actual thermal output and the quality of the heat. Different manufacturers engineer their units with varying rock capacities. This changes how the heat is stored and distributed. The physical elements generate the heat, but the stones act as the thermal battery. You cannot just throw any rocks in there; you need dense, igneous stones like vulcanite or olivine diabase that can withstand extreme thermal shock.
A 3KW unit designed with a larger stone volume, holding 60 or more pounds of rock, provides superior heat retention. It produces excellent steam when water is applied. However, this large thermal mass takes significantly longer to heat up initially. The elements have to transfer heat into the stones before the stones can heat the room air. Conversely, a unit with a smaller stone capacity of 20 to 30 pounds will heat the room air faster. The downside is it will struggle to recover its temperature quickly after water is poured over the rocks, leading to weaker steam generation.
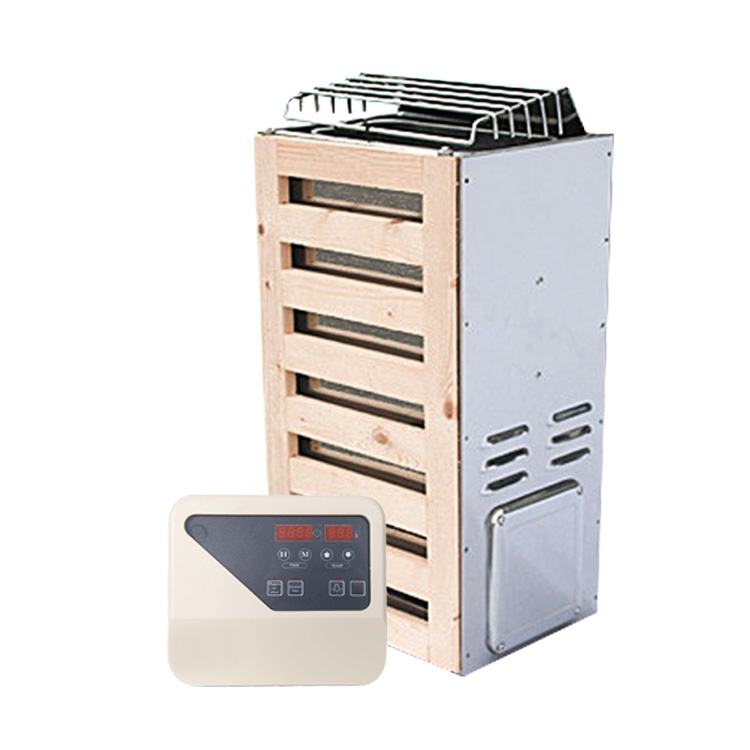
Evaluating a room based solely on its length, width, and height is a recipe for an underpowered build. Materials and the surrounding environment drastically alter the baseline calculations. Builders must calculate the adjusted volume to determine the true thermal demand placed on the heating unit. We see this mistake constantly on job sites. A homeowner frames a 4x4 room, buys a 3KW unit, and then installs a massive glass front. The room never gets hot.
Glass is a notoriously poor insulator. Even thick, tempered glass allows a massive amount of thermal energy to escape the room. To account for this thermal loss, builders must apply a multiplier effect to their volume calculations. You cannot ignore the thermal bridging that occurs through transparent surfaces.
The standard calculation requires adding 1.2 to 1.5 cubic meters (42 to 53 cubic feet) of adjusted volume for every 1 square meter (10.7 square feet) of glass surface. A single standard glass door can easily add 45 cubic feet of adjusted volume to the calculation. If you have a 100-cubic-foot room with a full glass door, your adjusted volume is now 145 cubic feet. This instantly renders a 3KW unit insufficient for the space.
Measure the height and width of all glass surfaces in meters.
Multiply the height by the width to get the total square meters of glass.
Multiply the total square meters by 1.5 to find the added cubic meters.
Convert the added cubic meters to cubic feet (multiply by 35.3).
Add this number to your physical room volume to get the final adjusted volume.
Heavy, dense materials like exposed stone, ceramic tile, concrete, or thick uninsulated timber act as massive heat sinks. These materials absorb thermal energy from the air. They prevent the room from reaching the target temperature until the materials themselves are fully heated through. If you build a sauna over an uninsulated concrete slab, that slab will constantly pull heat down and out of the room.
The calculation for heavy materials is similar to glass. You must add 1.2 cubic meters of adjusted volume for every 1 square meter of heavy, uninsulated surface. A decorative stone wall behind the heating unit might look visually appealing, but it acts as a thermal sponge. It drains the limited output of a small 3KW element. If you want stone accents, you need to upsize your power unit to compensate for the thermal mass.
The starting ambient temperature of the room dictates how hard the unit must work. Indoor installations located in climate-controlled basements or bathrooms start at a comfortable 68°F (20°C). The unit only needs to raise the temperature by roughly 110 degrees to reach bathing conditions. This is a manageable climb for a small element.
Outdoor installations, such as backyard barrel designs or custom sheds, face a completely different reality. In northern climates with sub-freezing winter temperatures, the starting ambient temperature might be 10°F (-12°C). This creates a massive thermal delta. A 3KW unit simply lacks the raw output to overcome a 170-degree temperature climb while simultaneously battling the continuous heat loss through the exterior walls. For this reason, a 3KW unit is almost never recommended for outdoor applications in cold regions.
Comparing the 3KW option against the next logical upgrades helps clarify the overall value and long-term satisfaction of the build. Understanding the differences in performance and installation requirements is crucial before finalizing a decision. You do not want to tear out drywall and run new wire six months after finishing your project because you undersized the unit.
The time-to-temperature curve is the most noticeable difference between unit sizes. A 3KW unit installed in a perfectly insulated 120-cubic-foot room may take 60 minutes or more to reach 180°F. The elements must work continuously to slowly build the thermal mass. You have to plan your sessions well in advance.
In contrast, a 4.5KW or 6KW unit installed in that exact same space might achieve the target temperature in 30 to 40 minutes. The higher wattage provides a rapid influx of thermal energy. This drastically reduces the waiting period and allows for more spontaneous bathing sessions. When you come home from a long day on the job site, you do not want to wait an hour and a half to sweat.
| Heater Size | Room Volume (Adjusted) | Estimated Time to 180°F | Breaker Requirement |
|---|---|---|---|
| 3.0 KW | 120 cu. ft. | 60 - 75 minutes | 20 Amp (220V) |
| 4.5 KW | 120 cu. ft. | 40 - 50 minutes | 30 Amp (220V) |
| 6.0 KW | 120 cu. ft. | 25 - 35 minutes | 30 Amp (220V) |
A common misconception is that a small 3KW unit can simply plug into a standard wall outlet. This is rarely the case. Most high-quality 3KW units require a dedicated 220V/240V circuit running on a 20-amp breaker. This requires hardwiring by a licensed electrician using 12 AWG wire. You cannot just tap into an existing lighting circuit.
When comparing this to a 6KW unit, which typically requires a 220V/240V circuit on a 30-amp breaker using 10 AWG wire, the installation logistics are nearly identical. If you are already hiring an electrician to pull a new 220V line from your main panel, the labor cost difference between installing a 20-amp circuit and a 30-amp circuit is negligible. The only minor difference is the cost of the thicker gauge wire.
Many buyers gravitate toward a 3KW unit believing it will significantly lower their monthly electricity bill. This is a myth based on a misunderstanding of how thermostats and duty cycles operate. A smaller element running constantly uses just as much power as a larger element running intermittently.
Consider the math. A 3KW unit running at full capacity for 90 minutes to reach and maintain temperature consumes 4.5 kWh of electricity. A 6KW unit running at full power for 30 minutes to heat the room, and then cycling on and off at 50% capacity for the next 60 minutes, consumes approximately 6 kWh. Modern, high-efficiency brands often consume 5–7 kWh in the first hour and drop to 4–6 kWh in the second hour as they simply maintain the heat.
The operational cost difference between the two units amounts to pennies per session. However, the user experience provided by the larger unit is significantly better. You get faster heat-up times, better steam recovery, and less waiting around.
Forcing a 3KW unit to do the job of a 4.5KW unit carries long-term consequences. Under-sizing is the most common mistake in custom builds, leading to mechanical failures and poor performance. We replace burnt-out elements all the time because builders tried to stretch a small unit across too large of a room.
When a unit is undersized for the adjusted volume of the room, it can never reach the set point on the thermostat. Because the target temperature is never achieved, the thermostat never trips to shut off the power. This means the heating elements run continuously at a 100% duty cycle. They glow red hot for hours on end without a break.
Heating elements are designed to cycle on and off. Forcing them to run constantly at maximum load leads to severe component strain. The metal degrades faster, leading to premature element burnout. Replacing burnt elements is frustrating, costly, and leaves the room unusable until repairs are made. You will spend more on replacement parts than you saved by buying the smaller unit.
A crucial part of the traditional experience is pouring water over the hot stones to create a burst of steam. An overworked 3KW unit struggles to maintain the temperature of the rock mass because all its energy is being spent trying to heat the room air. The rocks never get fully saturated with heat.
When water is poured onto insufficiently heated rocks, it does not instantly vaporize into high-quality, invisible steam. Instead, the water boils slowly, pools in the rock tray, or leaks straight through the bottom of the unit onto the floor. This ruins the humidity balance of the room and can cause water damage over time. You end up with a puddle on the floor instead of a wave of heat.
Real-world complaints often feature rooms that refuse to get hot enough, even when the volume calculations suggest a 3KW unit should work. Before assuming the unit is underpowered, check for common misconfigurations. Sometimes the equipment is fine, but the installation is flawed.
Thermometer Placement: Mounting the thermometer too high near the ceiling or too close to the ventilation intake leads to false readings. The thermometer should be placed at head height when sitting on the top bench, away from direct drafts.
Sensor Calibration: The temperature sensor dictates when the unit cycles off. Placing the sensor too close to the heat source causes it to read artificially high temperatures. The unit will cycle off prematurely, leaving the benches cold while the air immediately around the unit is hot.
Rock Placement: Packing the stones too tightly blocks airflow over the elements. The heat becomes trapped inside the casing, triggering the high-limit safety switch and shutting the unit down before the room gets hot. Repack the stones loosely to allow air to flow up through the element channels.
Ventilation Issues: Poor airflow creates stratification. If you do not have a proper intake vent under the unit and an exhaust vent on the opposite wall, the hot air will just sit at the ceiling.
To avoid the risks of under-sizing, industry professionals rely on a simple mitigation strategy. If your adjusted volume calculation lands exactly at the maximum limit of a 3KW unit, do not buy the 3KW unit. The industry best practice is to size up to the next tier, typically a 4.5KW unit.
Having slightly more power than necessary allows the unit to heat the room efficiently, maintain rock temperatures easily, and cycle off regularly to protect the elements. You can always turn a powerful unit down, but you can never force a small unit to produce more heat than its physical limit. It is better to have the power and not need it than to need it and not have it.
A 3KW unit is a highly effective piece of equipment, but its application is narrow. It is strictly suited for controlled, fully insulated, small indoor environments that calculate to under 130 adjusted cubic feet. It is not a magical solution for heating large spaces on a budget. When finalizing your build plans, use strict shortlisting logic. Choose a 3KW Home Electric Sauna Heater only if you are building a compact 1-to-2 person indoor closet or bathroom conversion featuring a solid wood door and perfect insulation. Immediately upgrade to a larger unit if your design includes a glass door, features exposed stone, is located outdoors, or exceeds the physical dimensions of 4x4x7 feet.
Measure your exact physical room volume using the interior stud-to-stud dimensions.
Calculate your adjusted volume by adding the necessary penalties for glass doors, windows, and uninsulated stone surfaces.
Consult your home's electrical panel capacity with a licensed electrician to ensure you can support the required dedicated 220V circuit.
Select a Sauna Heater that exceeds your final adjusted volume calculation by at least 10 percent to ensure rapid heat-up times and element longevity.
A: A 3KW unit can effectively heat between 100 and 130 cubic feet of well-insulated space. This maximum capacity decreases rapidly if the room features glass doors, uninsulated stone walls, or is located outdoors in a cold climate.
A: Generally, no. Most high-quality 3KW units require a dedicated 220V/240V circuit on a 20-amp breaker. You must hardwire these units using appropriate gauge wire. Always check the specific manufacturer's electrical requirements before purchase.
A: In an appropriately sized and insulated room under 130 cubic feet, a 3KW unit typically takes 45 to 60 minutes to reach traditional bathing temperatures of 175°F to 195°F. Poor insulation will extend this time significantly.
A: Yes. Glass is a poor insulator. For every square meter of glass in your room, you must add approximately 1.2 to 1.5 cubic meters (42 to 53 cubic feet) to your total volume calculation to properly size the unit.
A: It is highly discouraged in cold climates. Outdoor structures lose heat rapidly to the environment. A 3KW unit lacks the power to overcome freezing ambient temperatures while simultaneously heating the interior space and the heavy timber walls.


