Views: 0 Author: Site Editor Publish Time: 2026-07-29 Origin: Site

Selecting a Sauna Heater is the most critical mechanical decision in a sauna build, but the choice of control mechanism ultimately dictates the daily user experience, electrical complexity, and long-term reliability of the unit. Purchasing the wrong control type often results in frustrating operational limitations, premature failure of sensitive electronic components due to heat exposure, or unexpected and costly electrical rewiring during installation. This guide breaks down the mechanical differences, installation realities, and operational trade-offs between internal (built-in) and external control sauna heaters to facilitate an evidence-based purchasing decision. We will look at the exact wiring requirements, sensor placements, and thermal dynamics that dictate which system belongs in your specific build.
Simplicity vs. Precision: Internal controls offer all-in-one simplicity and lower upfront installation costs, making them highly practical for compact or outdoor residential saunas.
Component Longevity: External controls separate sensitive electronics from the extreme heat of the sauna room, significantly extending the lifespan of the thermostat and timer components.
Commercial Requirements: High-traffic environments necessitate external controls (e.g., utilizing a Commercial Outside Control 8KW Sauna Heater) to ensure safety compliance, restrict user access to temperature limits, and allow for remote operation.
Electrical Complexity: External units require a more complex wiring schematic, including routing lines to a separate contactor box, a wall-mounted keypad, and a ceiling-mounted temperature sensor.
An internal control heater houses the heating elements, rock basket, and mechanical controls within a single physical chassis. You will find the timer and thermostat dials located at the bottom-front or lower-side panel of the heater shroud. Manufacturers place them here to minimize direct heat exposure, as the floor level remains significantly cooler than the upper benches. Operation relies on a capillary tube thermostat filled with liquid or gas. As the ambient temperature rises, the substance inside the tube expands, eventually triggering a mechanical switch to break the electrical circuit when the room hits the target temperature.
These units utilize a mechanical 1-to-8 hour delay timer and a mandatory 60-minute continuous-run safety timer to comply with North American UL 875 standards. A built-in mechanical high-limit safety reset button sits at the base of the heater. If the room exceeds safe operating temperatures, this switch trips, cutting all power to the elements to prevent catastrophic thermal runaway. Resetting it requires physically pushing the button under the heater.
From a construction standpoint, internal controls simplify the rough-in phase. You only need to pull one dedicated high-voltage circuit from the main breaker panel directly to the heater location. There are no low-voltage wires to fish through the walls, and no external relay boxes to mount. This makes internal units highly favorable for outdoor barrel saunas or retrofits where opening up finished walls is impossible.
An external control system operates on a decentralized architecture. The heater itself acts purely as a heat source, while all control logic, switching, and monitoring are relocated outside the sauna cabin. This setup breaks down into four distinct components that must be wired together during the rough-in phase.
The heater unit contains only the heating elements, the rock tray, and a high-limit safety switch. The contactor box, often called a relay panel, houses the heavy-duty mechanical relays that physically switch the high-voltage power lines on and off. The control panel serves as the user interface, typically a low-voltage digital keypad mounted on the wall outside the hot room. Finally, a thermistor sensor mounts on the ceiling directly above the heater to provide highly accurate electronic temperature readings to the motherboard.
This decentralized setup enables advanced digital programming. Users get precise temperature readouts, programmable session times, and smart-home integration. Because the sensitive microprocessors and relays sit in a dry, climate-controlled environment outside the sauna, they do not suffer from the extreme thermal stress and humidity that internal components endure.
| Feature | Internal Control | External Control |
|---|---|---|
| Sensor Location | Floor level (built into heater base) | Ceiling level (directly above heater) |
| Wiring Complexity | Low (Single high-voltage line) | High (High-voltage + multiple low-voltage lines) |
| Component Lifespan | Moderate (Exposed to heat/humidity) | High (Isolated in dry environment) |
| Temperature Precision | ± 5-10°F variance | ± 1-2°F variance |
| User Interface | Mechanical dials on heater | Digital keypad outside room |
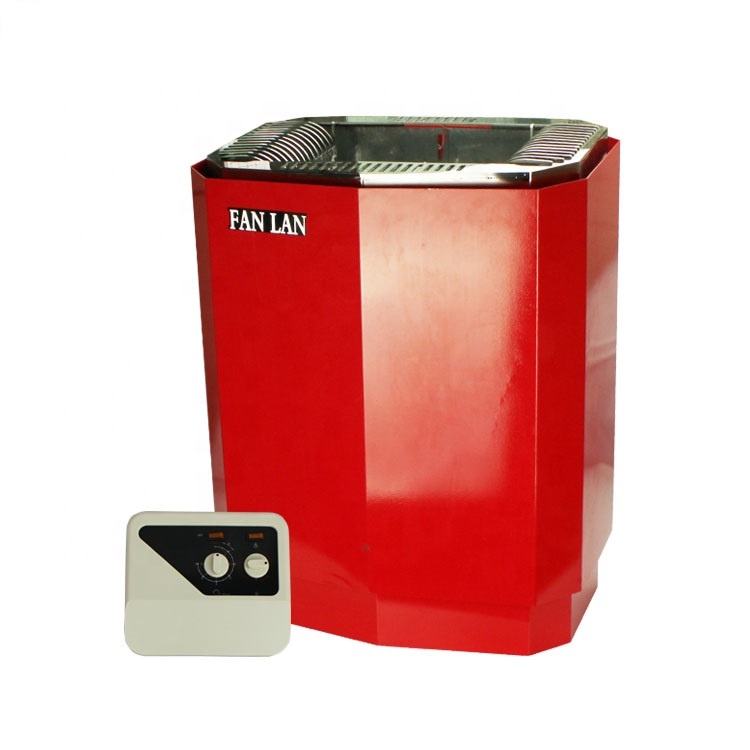
Heat naturally rises, creating extreme temperature stratification inside a sauna cabin. The air near the floor might sit at 90°F while the ceiling hits 190°F. Internal controls use built-in capillary sensors to measure the temperature at the floor level. Because the sensor sits in the coldest part of the room, the thermostat must guess the bench-level temperature. This often leads to wider temperature swings, premature short-cycling, and a less consistent climate. If the floor is exceptionally cold, such as in an outdoor sauna on a concrete slab, the heater may run continuously, tripping the high-limit switch before the upper benches reach the desired heat.
External controls solve this stratification issue through precise sensor placement. The ceiling-mounted thermistor measures the heat exactly where it is most intense, directly above the heater. It communicates real-time micro-adjustments to the digital motherboard in the contactor box. This allows the system to hold the room to within a tight margin of the set temperature, providing a highly consistent and comfortable bathing experience.
Operating an internal control heater requires the user to bend down near a hot appliance in a dim environment to adjust mechanical dials. The timer dial often doubles as the on/off switch, requiring a firm twist past a heavy mechanical detent. This can be inconvenient and potentially unsafe for users with limited mobility. Reading the exact temperature setting on a mechanical dial is also largely guesswork.
External controls allow users to pre-heat the room and monitor the status without opening the door and letting heat escape. Digital displays provide backlit, highly visible target and current temperature readings. For commercial public saunas, controls must be mounted outside the hot room at ADA-compliant heights, typically a maximum of 48 inches from the finished floor. This allows universal access for staff and prevents unauthorized temperature adjustments by guests. You cannot achieve ADA compliance with floor-mounted internal dials.
Internal mechanical parts undergo brutal environmental conditions. The contacts, springs, plastic dials, and copper capillary lines experience repeated thermal expansion and contraction cycles. Temperatures range from ambient room temperature to nearly 200°F, combined with heavy moisture from steam when users pour water on the rocks. This harsh environment accelerates solder joint failure, contact oxidation, and plastic embrittlement. Over years of heavy use, the mechanical timer is usually the first component to fail, requiring a complete replacement of the lower control board.
External systems isolate the vulnerable components. Relocating the digital motherboard, microprocessor, and high-voltage switching relays to a dry, climate-controlled exterior wall prevents environmental wear. The only component inside the room is the sealed thermistor probe and the heating elements themselves. This separation drastically reduces long-term component failure rates and extends the life of the control system, making it the standard for heavy-duty applications.
Internal controls are limited strictly to managing the heating elements. If you want interior lighting or ventilation fans, you must wire and switch them on separate, independent circuits. This means multiple switches on the wall outside the sauna.
Modern digital external controllers act as unified command centers. They allow the user to control the heater, interior LED chromotherapy lighting, exhaust ventilation fans, and even sound systems from a single interface or smartphone app. The contactor box contains auxiliary relay outputs specifically designed to handle these additional loads, streamlining the electrical installation and providing a cleaner finish on the exterior wall.
Wiring an internal control heater involves a straightforward electrical pathway. You run a single high-voltage dedicated circuit directly from the main breaker panel to the sauna location. The wire transitions into a flexible liquid-tight conduit before entering the terminal block at the base of the heater. This standard electrical install requires minimal electrician hours and zero low-voltage signal wiring.
Because everything is self-contained, you do not need to worry about fishing sensor wires through insulated walls or penetrating the foil vapor barrier multiple times. This makes internal heaters perfect for retrofits in finished rooms where opening drywall to run sensor cables is not feasible. You simply mount the heater, connect the power lines, and load the rocks.
External control heaters require a significantly more complex electrical pathway. You must plan this architecture carefully during the framing stage, long before the cedar paneling goes up. Failure to route the necessary conduits early will result in tearing down finished walls.
Mount the contactor box in a dry, accessible location outside the sauna, such as a utility room or adjacent hallway.
Run the primary high-voltage line from the main breaker panel to the contactor box.
Run a secondary high-voltage line from the contactor box to the heater location inside the sauna.
Route a low-voltage control cable from the contactor box to the external user interface panel location.
Route a low-voltage sensor wire from the contactor box, through the wall and ceiling cavities, to the exact sensor location above the heater.
This process requires routing conduits and wires behind the wood paneling and through the foil vapor barrier before sealing the room. Every penetration of the vapor barrier must be meticulously sealed with high-temperature foil tape or high-temp silicone to prevent moisture from escaping into the wall framing. If moisture bypasses the vapor barrier through an unsealed sensor wire hole, it will condense in the fiberglass insulation, leading to rot and mold.
Choosing the right control type depends heavily on the intended use case and the physical constraints of the building. Residential installations often prioritize ease of installation and lower upfront costs. If you are building a small basement sauna or a backyard barrel sauna, an internal control heater provides everything you need without the headache of routing low-voltage wires. The mechanical dials are robust enough for daily residential use, and the simplified wiring keeps electrician costs down.
However, residential builders seeking precise temperature control, smart home integration, or a cleaner interior aesthetic will benefit greatly from an external system. The ability to turn the sauna on from your smartphone while driving home from work is a major selling point for external digital controllers.
Commercial environments demand the durability, safety, and access control provided by external units. Public saunas in gyms, hotels, or wellness centers must adhere to strict safety codes and accessibility standards. You cannot have gym members bending down to adjust a hot heater dial. External controls allow facility managers to lock the temperature settings, set maximum run times, and monitor the room from the front desk. For these high-traffic applications, external controls are non-negotiable.
Evaluate your wall framing and vapor barrier status to determine if routing low-voltage sensor wires is still physically possible for your build.
Assess the primary users of the sauna to decide if ADA compliance, remote access, and locked temperature settings are necessary for your facility.
Consult with a licensed electrician to review the specific contactor box dimensions and wiring schematics for your chosen external heater model.
Map out the exact placement of the ceiling-mounted thermistor according to the manufacturer specifications before installing your ceiling paneling.
A: Generally, no. Internal control heaters are manufactured with integrated mechanical components. Converting them to an external system requires significant internal rewiring and bypassing safety switches, which voids the warranty and compromises UL safety certifications. You must purchase a heater specifically designed for external controls from the start.
A: External controls require a contactor box, which acts as a dedicated relay panel. This box receives high-voltage power from your main breaker panel and distributes it to the heater elements based on low-voltage signals received from the digital control keypad and the ceiling temperature sensor.
A: Yes, internal controls are designed to withstand the moisture generated by pouring water on the sauna rocks. However, the mechanical components will eventually wear out faster than external controls due to the repeated exposure to extreme heat and high humidity at the base of the heater.
A: The thermistor sensor must be mounted on the ceiling directly above the heater or high on the wall near the heater, strictly according to the manufacturer's specific instructions. This ensures accurate temperature readings at the hottest point in the room to prevent overheating.
A: Yes, many modern external control systems offer Wi-Fi connectivity and dedicated smartphone apps. This allows you to pre-heat the sauna remotely, adjust target temperatures, control auxiliary lighting, and monitor the room status from anywhere with an internet connection.


