Views: 0 Author: Site Editor Publish Time: 2026-07-07 Origin: Site
Upgrading your home by adding a dedicated wellness space represents a significant investment in long-term health and property value. However, building a highly effective heat therapy sanctuary depends entirely on meticulous upfront planning.
Moving from the initial idea phase to physical implementation requires serious attention to detail. You must navigate strict electrical codes, source heat-resistant materials, and optimize spatial design for comfort. Ignoring these critical steps often leads to structural damage or underperforming heaters.
This comprehensive guide breaks down the structural, technical, and spatial requirements you need. We explore how to successfully plan and install a beautifully crafted space. You will discover exactly what it takes to build a retreat ensuring it operates safely, runs efficiently, and stands the test of time.
Material Integrity: True solid wood cabins provide essential thermal mass and prevent the toxic off-gassing associated with glued veneers under high heat.
Space Allocation: A comfortable family sauna room requires a minimum of 45–50 cubic feet per person and a multi-tiered bench layout.
Infrastructure First: Electrical upgrades (typically dedicated 240V circuits) and proper airflow (intake/exhaust vents) are non-negotiable for safety and heater efficiency.
Avoid Common Pitfalls: Skipping floor waterproofing or ignoring heater clearance dimensions are the most frequent causes of failed residential installations.
Choosing the right construction material dictates the entire experience of your home spa. A properly built solid wood sauna cabin acts as the gold standard for residential wellness upgrades. Dense natural timber serves a critical mechanical purpose beyond mere aesthetics.
Dense natural wood absorbs heat energy deeply into its cellular structure. It then radiates this warmth evenly back into the room. This thermal mass effect eliminates uncomfortable cold spots often found in poorly insulated composite builds. When you step inside a genuine timber enclosure, the walls themselves actively contribute to the enveloping heat. Synthetic alternatives simply reflect heat superficially, leading to sharp temperature drops the moment a door opens.
Authentic heat bathing involves dramatic humidity swings. Pouring water over hot rocks creates traditional steam, known as löyly. Solid wood naturally breathes, expanding and contracting harmoniously as humidity levels rise and fall. It handles extreme moisture without warping, cracking, or delaminating. Veneers and cheap panels trap moisture beneath their top layers. This trapped water quickly causes structural rot and bubbling.
Safety remains the ultimate priority in extreme heat environments. Temperatures regularly exceed 190°F inside these spaces. At these temperatures, plywood and composite boards release dangerous volatile organic compounds (VOCs). These panels rely heavily on toxic adhesives. Solid timber completely avoids these synthetic chemicals and glues. Industry health authorities strongly recommend using pure, untreated timber to guarantee clean, breathable air during your sessions.
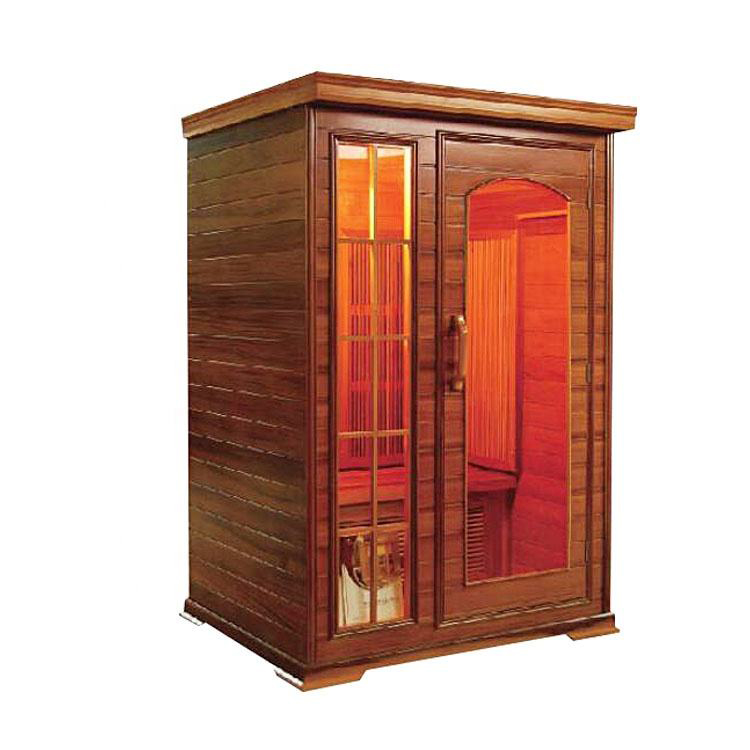
Proper spatial planning determines how comfortable and functional your space will be. Designing a family sauna room requires calculating precise dimensions to accommodate everyone comfortably while optimizing energy usage.
You must allocate enough room for occupants to relax without feeling cramped. A reliable rule of thumb suggests planning for exactly 2 feet of bench space per adult. Standard family configurations usually measure 5x7 feet or 6x8 feet. A 6x8 footprint comfortably seats a family of four, allowing enough room for one adult to recline fully.
Efficient seating arrangements maximize usable space. An L-shape layout works best for square rooms, minimizing dead space in the corners. It allows multiple people to converse face-to-face. Parallel layouts suit long, narrow spaces better.
You must also follow the "Law of Löyly." Heat naturally rises to the top of the room. Upper benches are absolutely mandatory to experience true therapeutic temperatures. You should plan your lower benches primarily as access steps. These lower tiers also serve beautifully as cooler resting zones for young children.
Builders often make the mistake of installing overly high ceilings. We strongly warn against building ceilings higher than 7 feet. Tall ceilings trap the most valuable heat high above the occupants' heads. You end up wasting tremendous amounts of electrical energy trying to heat dead space. Keeping the ceiling lower ensures the hottest air envelops the bathers sitting on the upper benches.
Behind every beautiful timber finish lies a network of crucial infrastructure. Planning your electrical wiring, ventilation, and flooring dictates the safety and longevity of your build.
Electrical preparation is often the biggest hurdle in residential installations. You must hire a certified electrician for hardwiring. Plug-and-play options rarely deliver authentic heat therapy. Standard residential heaters draw significant power. A typical 6kW to 9kW heater requires a dedicated 30 to 40-amp, 240V breaker. You must confirm your home electrical panel has the capacity to support this extra load before purchasing any equipment.
Airflow dictates comfort and air quality. The "Passive Draft" system is the industry standard for proper ventilation. You place an intake vent directly beneath the electric heater. You then position an exhaust vent on the opposite wall, just below the upper bench level. Cold, fresh air enters near the heater, gets warmed, rises, circulates through the room, and exits gracefully.
Consequences of poor ventilation are severe. You will experience heavily stratified heat, where your head burns while your feet freeze. Stale air quickly leads to dizziness, and trapped moisture dramatically increases mold risk.
Timber enclosures rarely include structural floors. You must prepare a suitable base before installation begins. We highly recommend using waterproof, non-slip surfaces. Concrete slabs, ceramic tile, and heavy-duty vinyl serve as excellent foundations. For traditional wet bathing, a central floor drain becomes an absolute necessity. It allows excess water to escape, keeping your space hygienic and easy to clean.
Selecting the right timber species balances aesthetic preferences, budget constraints, and longevity. Not all lumber handles extreme heat and humidity equally well.
Western Red Cedar stands as the premium choice globally. It features a naturally antimicrobial profile and remains highly resistant to decay. Furthermore, it stays remarkably cool to the touch even when room temperatures soar. It emits a rich, traditional aroma. However, you will pay a significant cost premium for this lumber.
These represent the traditional European choices. They offer excellent value for budget-conscious families. However, you must insist on "thermally modified" options. Raw pine contains sap pockets. Under high heat, untreated pine leaks hot resin, which can cause severe skin burns. Thermal modification bakes the wood beforehand, eliminating moisture and locking the sap safely away.
Hemlock provides a strong, durable alternative. It features a lighter color and lacks strong odors. This makes it a highly hypoallergenic option for families sensitive to the robust scent of cedar. You must ensure suppliers properly kiln-dry hemlock, as it remains prone to warping if retaining too much raw moisture.
| Wood Species | Heat Resistance | Aroma Profile | Cost Level | Best Use Case |
|---|---|---|---|---|
| Western Red Cedar | Excellent (Stays cool) | Strong, Traditional | Premium | Luxury home installations |
| Thermally Modified Spruce | Very Good | Mild, Earthy | Moderate | Authentic European aesthetic |
| Kiln-Dried Hemlock | Good (Needs curing) | None (Hypoallergenic) | Affordable | Scent-sensitive families |
Navigating the construction process safely requires adhering to strict rules. Small mistakes during framing or assembly severely impact daily operation. Follow these precise guidelines to ensure structural integrity and user safety.
Account for door swing clearances: Always install doors so they open outward. Never install a lock on the door. This ensures rapid, safe exits if someone feels faint from the heat.
Seal the exterior selectively: If building outdoors, apply weather-resistant sealants to the exterior facade. This blocks rain and UV damage.
Leave the interior wood raw: Never paint, stain, or seal the interior timber. Raw wood must breathe to absorb moisture and release heat evenly.
Add low-voltage lighting: Install dimmable LED strips under the benches. This provides a relaxing ambiance while keeping fixtures away from the highest heat zones near the ceiling.
Don't crowd the heater: Never place the electric heater too close to combustible materials. You must strictly adhere to the manufacturer's clearance specifications. Failing to do so creates a severe fire hazard.
Don't neglect vapor barriers: Indoor installations require a continuous foil vapor barrier behind the wood paneling. The foil reflects radiant heat inward and protects your home's wall framing from moisture rot.
Don't use exposed metal fasteners: Avoid leaving screw heads or nails exposed on the seating surfaces. Metal conducts heat rapidly and will burn bare skin upon contact. Always countersink and plug your hardware.
Your final major decision involves choosing between a pre-engineered kit or a fully custom build. Each path offers distinct advantages depending on your space and mechanical skills.
Modular kits work best for standard indoor rooms or flat outdoor concrete pads. Manufacturers engineer these packages to exact specifications. They offer a much faster installation timeline. You benefit from highly predictable costs and tested structural safety. Most homeowners can assemble a panelized kit over a single weekend using basic hand tools.
Custom builds become necessary when dealing with unique architectural spaces. If you want to convert a sloped attic, an unused closet, or the dead space under your stairs, you must build from scratch. This route requires a specialized contractor who understands specialized insulation, moisture mitigation, and custom glasswork.
Measure your space: Record the exact length, width, and height of your proposed area. Ensure you account for door swing radiuses and exterior ventilation paths.
Consult an electrician: Book an assessment to check your main panel's capacity. Get a formal quote for running a dedicated 240V line to the intended heater location.
Request material samples: Contact verified manufacturers to request physical wood samples. Test the aroma of cedar against hemlock to see what your family prefers.
Check local building codes: Verify if your municipality requires specific permits for hardwired heating appliances or auxiliary outdoor structures.
Planning a heat therapy sanctuary primarily serves as an exercise in infrastructure readiness and intelligent material selection. Success depends on accurately calculating room dimensions, ensuring robust electrical capacity, and designing proper airflow systems. Cutting corners on ventilation or vapor barriers inevitably leads to poor performance and structural headaches.
Prioritizing authentic timber over synthetic alternatives guarantees a safe environment. It delivers genuine heat therapy, eliminates toxic off-gassing, and promises exceptional structural longevity. When you invest in quality craftsmanship, your home spa becomes a durable asset.
Take the next step toward elevated daily wellness. Browse specific timber cabin kits designed for residential use. Download a comprehensive pre-installation checklist to organize your measurements. Consider booking a free spatial consultation with a design expert to map out the perfect layout for your property.
A: Running an electric heater remains surprisingly affordable. Based on standard residential kilowatt-hour rates, a typical 45-minute session uses roughly 4 to 6 kWh of electricity. This usually translates to an operational cost of $0.50 to $1.00 per session, making it a highly cost-effective daily wellness routine.
A: Yes, provided the deck can support the heavy structural load of the timber and the occupants. However, you must install a non-combustible floor barrier, such as a thick cement board or tile pad, directly under the heater to prevent fire risks.
A: Interior maintenance is minimal. Wipe down the benches with a damp cloth after each use. Once a year, use a mild soap and water solution to remove body oils. If sweat stains persist, lightly sand the benches with fine-grit sandpaper. Never apply chemical sealants.
A: Heating times depend heavily on the electric heater's kilowatt rating and your starting ambient temperature. Generally, a properly insulated room requires 45 to 60 minutes to reach an optimal therapeutic temperature of 175°F to 190°F.


