Views: 0 Author: Site Editor Publish Time: 2026-07-11 Origin: Site
Purchasing a solid wood sauna is a significant capital investment. It permanently modifies your property layout. Buyers often focus heavily on aesthetics. They routinely overlook critical structural, electrical, and thermal performance requirements. This common oversight leads to unexpected installation costs. It also causes premature wood degradation over time.
We provide a hard-nosed, practical evaluation framework below. You will learn how to vet sauna cabins effectively before making a purchase. You must scrutinize material thickness, electrical logistics, and vendor compliance. Our guide ensures long-term durability and absolute safety. It guarantees a reliable return on your wellness investment. Avoid costly mistakes by following these essential evaluation steps.
Wood thickness matters: Solid wood cabins rely on thermal mass; minimum thickness and profile design dictate heat retention and structural stability.
Electrical is a hidden bottleneck: A dedicated 220V/240V circuit is mandatory for most traditional heaters; contractor costs must be factored into the initial budget.
Ventilation dictates lifespan: Without proper passive or mechanical airflow, solid wood cabins risk rapid moisture damage and poor heat distribution.
Warranty fine print varies: Evaluate warranties by isolating the wood structure, heater elements, and control panels, as they degrade at different rates.
Substandard wood expands, contracts, and warps under extreme temperature fluctuations. A sauna environment alternates between intense dry heat and high moisture. Poorly milled timber struggles under these rapid shifts. It eventually cracks or splits. This causes major heat leaks and eventual structural failure. You must evaluate materials rigorously before ordering a solid wood sauna cabin.
Manufacturers utilize three primary solution categories for timber selection. First, Western Red Cedar offers superior natural rot resistance. It boasts high thermal mass but carries a premium price tag. Second, Nordic Spruce and Hemlock serve as budget-friendly alternatives. However, they require careful kiln-drying to prevent warping. They also possess lower natural rot resistance. Third, thermo-treated wood provides an innovative middle ground. Manufacturers bake the timber at high temperatures. This process mechanically enhances its dimensional stability.
Table 1: Sauna Wood Species Comparison
| Wood Species | Durability | Thermal Mass | Price Bracket |
|---|---|---|---|
| Western Red Cedar | Exceptionally High | Excellent | Premium |
| Nordic Spruce | Moderate | Good | Budget-Friendly |
| Thermo-Treated | High | Very Good | Mid-to-High |
You must demand adequate lumber thickness. Insist on a minimum thickness of 1-3/8” to 1-5/8” (35mm-40mm). This ensures true thermal retention. Thinner profiles lose heat rapidly. They force your heater to run constantly. Thick wood absorbs and radiates heat evenly.
Joinery precision dictates long-term stability. Verify the use of deep tongue-and-groove (T&G) profiles. Shallow T&G joints will inevitably separate. The wood naturally shrinks in a dry environment. Deep joints maintain a tight structural seal. They prevent cold drafts from ruining your session.
Lumber grade affects safety and aesthetics. Always check for "clear" versus "rustic" grading. Clear wood is entirely knot-free. Rustic wood contains numerous knots. Dead knots shrink over time. They often fall out completely. This creates permanent drafts. Knots can also leak scalding sap. Clear lumber eliminates these burn hazards entirely.
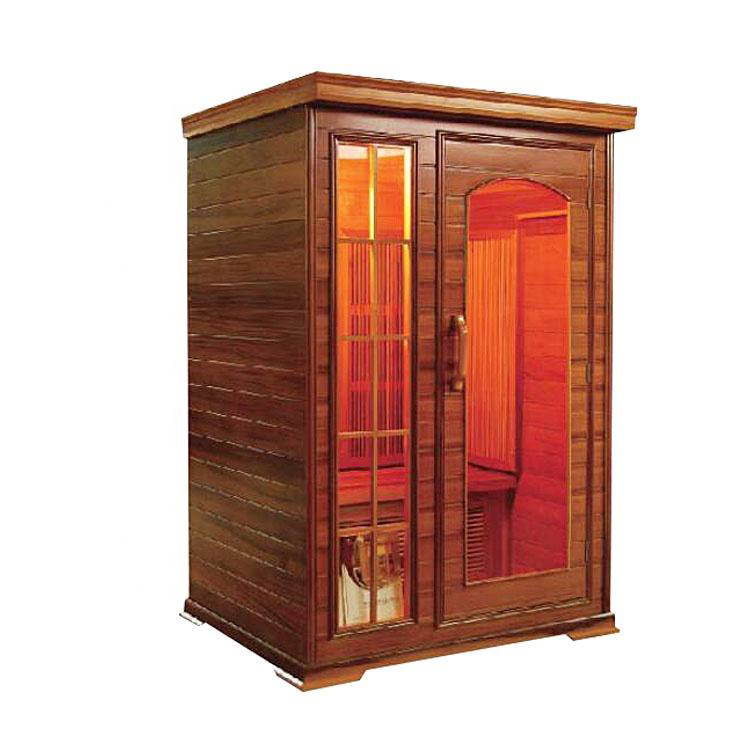
Miscalculating internal volume versus external footprint creates numerous problems. It leads to poor user comfort. It restricts adequate bench height. It also wastes massive amounts of electrical energy. Designing a functional home sauna room requires precise spatial planning. You must account for human ergonomics and heat physics simultaneously.
Heat naturally rises to the ceiling. The ideal internal height measures between 78 and 84 inches. Higher ceilings waste valuable heat energy. The hottest air gets trapped far above your head. Lower ceilings present a different issue. They prevent proper multi-tier bench installation. You need enough vertical space for an upper and lower bench.
User comfort relies on proper bench dimensions. The upper bench must measure at least 24 inches deep. This allows bathers to recline comfortably. Narrow benches cause muscle fatigue during long sessions. Layout safety is equally critical. Ensure your design keeps users completely out of the direct heater safety clearance zone. Accidental burns occur frequently in poorly planned layouts.
Thick timber structures are exceptionally heavy. A standard setup easily exceeds 1,000 pounds once you add the cabin, users, and a rock-filled heater. Assess your intended site carefully.
Decks: Verify joist spacing and structural load limits.
Concrete Pads: Ensure the surface is perfectly level. Pitching causes cabin assembly issues.
Indoor Floors: Reinforce standard joists if placing the unit on a second story.
Bare timber absorbs significantly more initial heat than insulated or foil-lined walls. Standard volumetric math fails here. Sellers often use generic formulas meant for indoor modular kits. This results in an underpowered heater. You will experience frustratingly long heat-up times. Your unit might never reach the desired 190°F target.
You must adjust your calculations for raw timber. First, calculate the standard internal cubic footage (Length x Width x Height). Then, multiply this base number by 1.2 to 1.5. This gives you the adjusted volume for accurate heater sizing. The extra 20% to 50% accounts for the heat absorbed into the thick wooden walls.
Chart 1: Heater Sizing Calculation Matrix
| Base Volume (Cu. Ft.) | Multiplier Applied | Adjusted Volume | Recommended Heater (kW) |
|---|---|---|---|
| 150 | 1.3 (Average Timber) | 195 | 4.5 kW |
| 200 | 1.3 (Average Timber) | 260 | 6.0 kW |
| 300 | 1.3 (Average Timber) | 390 | 8.0 kW - 9.0 kW |
Map your adjusted volume to the manufacturer's output chart. Typically, you need 1 kW per 45 to 50 cubic feet of adjusted volume. Understand the difference between hardwiring and plug-and-play models. Most effective traditional heaters range from 4.5kW to 9kW. They strictly require a dedicated 220V/240V hardwired connection. You must hire a licensed electrician for this phase.
Best Practice: Always check your local breaker panel capacity before ordering. Many older homes lack available amperage. A heavy-up panel upgrade easily costs $1,500 or more. Discovering this limitation after delivery creates severe budget stress.
Buyers routinely underestimate the required labor, specialty tools, and site preparation. Assembling a pre-milled kit differs vastly from building from scratch. Both approaches offer unique advantages. You must align your choice with your construction skills and timeline.
Pre-cut or pre-fab kits ship directly from the factory. Workers manufacture them to exact specifications. They utilize interlock assembly systems. This allows for rapid, predictable deployment. Conversely, building a custom sauna cabin happens entirely on-site. It allows for non-standard dimensions. However, it requires significant framing, insulation, and carpentry expertise.
Consider site accessibility immediately. Delivery trucks drop off massive loads. Can you move a ,1500-pound pallet to your backyard? Look out for narrow gates, soft lawns, or steep driveways. You might need to uncrate the pallet in your driveway. You will carry individual planks by hand to the site.
Assembly Requirements: Verify the tool list. Does the cabin require only a rubber mallet and drill? This indicates a true prefab kit. Does it require custom cutting, leveling, and weatherproofing? This signifies a custom or semi-custom project.
Ventilation Prep: Proper airflow prevents carbon dioxide buildup and wood rot. Ensure your kit includes pre-drilled intake vents below the heater. It must also feature an exhaust vent high on the opposite wall.
Common Mistake: Blocking the exhaust vent to "save heat." This ruins the convection current. It causes uneven temperatures and creates an uncomfortably stuffy environment.
The wellness market contains many fly-by-night importers. They sell cheap cabins online. These units often feature counterfeit safety certifications. Their warranties frequently void upon self-installation. You must protect yourself by verifying compliance credentials.
Look specifically for UL (Underwriters Laboratories) or ETL safety listings. The certification must cover the entire heater unit. Deceptive vendors highlight UL-listed internal wires while the overall appliance remains uncertified. Operating an uncertified 240V appliance in a wet environment poses extreme fire and shock risks.
Read the fine print on any "Lifetime Warranty" claim. Vendors aggressively bifurcate their warranty terms. The lifetime coverage usually applies only to the wood against manufacturing defects. It rarely covers natural warping or splitting. Evaluate the specific coverage duration for heating elements. Elements undergo intense thermal stress. They typically carry a 1-to-5-year warranty. Control boards also fail at different rates.
Verify if the vendor stocks replacement heater elements domestically. Waiting months for overseas parts ruins your winter bathing season. Reject vendors who refuse to provide installation manuals prior to purchase. Eliminate sellers who lack transparent electrical requirement sheets. Transparent documentation proves vendor reliability.
Ordering a solid wood structure requires moving completely past visual aesthetics. You must validate structural thickness and precise joinery. You must perform accurate heater scaling using adjusted volume metrics. Electrical readiness dictates your true installation timeline.
Follow a strict decision matrix. First, confirm your electrical panel capacity with a licensed professional. Next, ensure a solid, level foundation exists at your site. Finally, proceed to compare T&G thickness and wood species among top brands.
Your immediate next action is straightforward. Download the detailed installation manuals for your top three choices. Send the electrical specifications to a licensed electrician. Obtain a hardwire quote before you ever click the checkout button.
A: While not strictly mandatory for residential use, a floor drain is highly recommended if you plan to use large amounts of water for löyly (steam) or wash down the cabin regularly.
A: Without a secondary roofing material (like asphalt shingles or EPDM rubber), barrel and solid wood cabin joints can seep water over time as wood naturally expands and contracts. A protective roof layer is strictly advised.
A: Assuming an 8kW heater running for 1.5 hours at a national average of $0.15 per kWh, it costs roughly $1.80 per session. The bulk of the expense is in the upfront electrical installation, not daily operational costs.


